Tile flooring has long been a popular choice for homeowners in Dallas. It offers a perfect blend of style, durability, and easy maintenance. Whether you’re renovating a single room or planning a full-scale home makeover, choosing tile can really elevate the look of your home. As Dallas homes come in various styles, from modern condos to rustic ranch houses, tile flooring provides versatility to match any aesthetic. The key, however, lies in the correct installation of these tiles. A proper installation not only enhances the floor’s appearance but ensures that it stands the test of time.
When you think of projects like installing tile flooring, it’s important to focus on getting it right from the beginning. Choosing the right tiles according to your space is a crucial first step. After all, no one wants to redo the tiles after finding they didn’t quite match or stand up to the room’s conditions. This guide will help you navigate the process, from selecting the perfect tiles to laying them out with precision so your floor becomes the envy of every guest.
Choosing the Right Tiles
Before you plunge into installation, take a moment to consider which type of tile suits your space. Here’s what you should ponder:
– Types of Tiles: The common options include ceramic, porcelain, and stone. Each has its own charm and durability. Ceramic tiles are generally affordable and come in endless designs. Porcelain tiles, on the other hand, are denser and good for high-traffic areas. Stone tiles, like marble or granite, offer a natural look but require more care.
– Factors to Consider: Ask yourself where the tiles are going. Kitchens and bathrooms have different requirements than living rooms. High foot traffic areas demand tougher tiles. You’ll want to think about moisture, too—tiles in a bathroom need to resist water better than those in a dry hallway.
– Design Tips: Balance aesthetics and functionality when making your choice. You might want to choose colors that blend well with your furniture and wall colors. If your room is small, light-colored tiles can make it seem bigger.
Choosing wisely can make a world of difference. It’s like picking the right outfit for a special event—it has to fit the occasion perfectly and last as long as you need it to. Once you’ve got your tile choices sorted, you’ll be well on your way to transforming your space into something both beautiful and practical.
Preparing the Subfloor
Before laying down tiles, it’s crucial to ensure that the subfloor is clean, flat, and solid. A well-prepared subfloor is the foundation for a flawless tile floor. Think of it as setting a stage for a performance—if the stage is shaky, the show won’t go well.
First, clear away any debris or old adhesive from previous installations. A clean surface prevents irregularities and helps the tiles sit firmly. Next, check for any dips or bumps. Use a leveling compound to smooth out these areas, creating a level surface where your tiles can settle without issues. If there are any cracks or damages, repair them before proceeding. A solid subfloor keeps everything stable.
Consider using an underlayment, which can provide extra support and help with moisture control. This layer acts like a buffer between the tiles and the subfloor, enhancing durability and preventing movement that can lead to cracks.
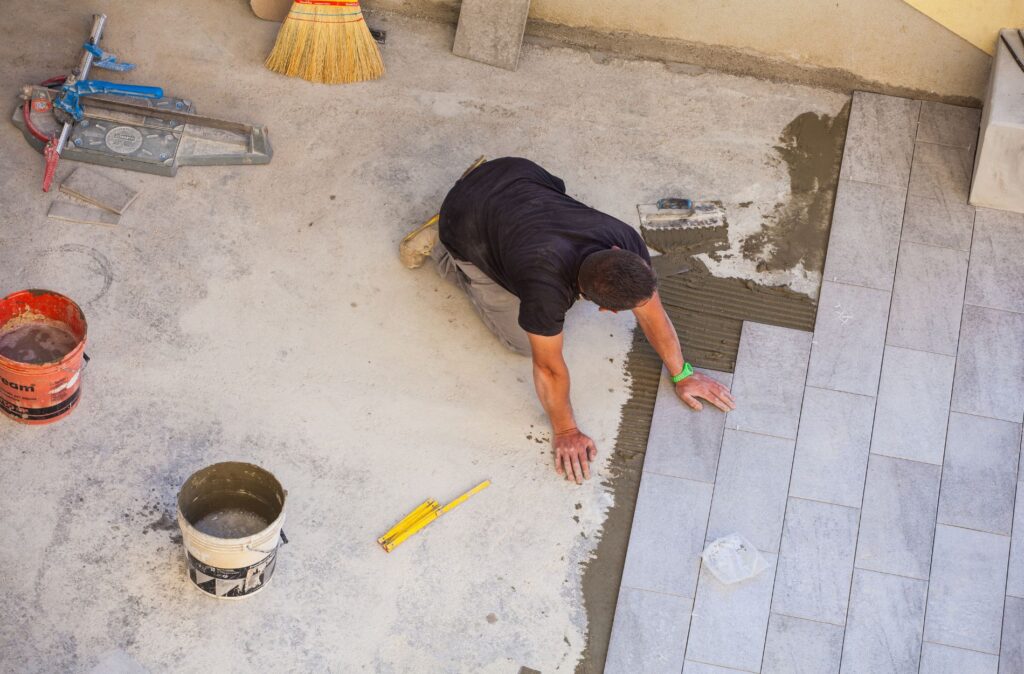
Installation Process
Once the subfloor is ready, it’s time for the main act—the installation itself. Gather your tools and materials, including tiles, adhesive, a tile cutter, spacers, and a notched trowel. Planning ahead ensures a smoother process.
Start by measuring the area carefully. Mark the positions where each tile will go, starting from the center and working towards the edges. This approach ensures that the tiles are laid out evenly. When cutting tiles for edges, a tile cutter or wet saw will be useful to get precise cuts without breaking the tiles.
Next, apply adhesive to a small section of the floor using a notched trowel. Be careful not to work on too large an area at once, as the adhesive can dry out quickly. Set the tiles securely into the adhesive, using spacers to maintain even gaps between the tiles. Proper spacing prevents future issues like tiles pressing against one another and cracking over time.
Grouting and Finishing Touches
After all the tiles are in place, the next step is grouting. Grouting fills the gaps between tiles, providing stability and a finished look. Mix the grout according to the instructions and apply it using a rubber float. Press it firmly into the gaps, ensuring that no spaces are left uncovered.
Once the grout dries slightly, use a damp sponge to wipe away any excess from the surface of the tiles. This technique keeps the tiles clean while leaving the grout intact. Sealing the grout is another step that can’t be skipped. A good sealant protects against stains and moisture, ensuring your floors stay looking new.
Finally, complete with a thorough cleanup. Make sure all tiles are aligned and the surfaces are free of any adhesive or grout residues. This attention to detail gives your floor a professional and polished look.
Keeping Your New Floor in Top Shape
Once your tile flooring is installed, maintaining its pristine condition requires regular care. Daily sweeping and occasional mopping with a gentle cleaner will keep it shining. For a deeper clean, use a non-abrasive tile cleaner periodically. Address stains immediately by blotting—rather than rubbing—to prevent them from setting in. Repair any cracks promptly to avoid more extensive damage over time. By investing a little time in routine care, your tile floors will remain beautiful and durable for years.
Wrap-Up
Implementing these steps carefully when installing tile flooring is worth the effort, rewarding you with a beautiful floor that withstands daily wear and tear. Proper preparation, choice of materials, and detailed installation are key to having a floor that not only looks great but also functions well. Whether you’re sprucing up your kitchen or revamping a bathroom, these practices will yield results that truly enhance your home.
To ensure your tile floor project in Dallas is as smooth and professional as possible, consider reaching out to Spire Construction & Remodeling for expert assistance. Their team specializes in tile flooring installation in Dallas, providing a level of expertise and care that can transform your space beautifully. Whether you’re tackling a new installation or need advice on materials, their experience and knowledge can bring your flooring vision to life seamlessly.