Installing new hardware in your home can be a fun and rewarding project. Whether you’re updating handles on cabinets or replacing door knobs, a fresh set of hardware can dramatically change the look and feel of any room. With the right tools and a bit of patience, doing it yourself not only saves money but also gives you the satisfaction of personalizing your space.
Before diving into the installation, it’s crucial to plan and prepare. Knowing which tools you’ll need, selecting compatible hardware, and preparing your work area are important first steps. This preparation helps ensure the installation goes smoothly and looks professional.
Taking the time to understand the process and potential challenges can make even complex installations manageable. With some thoughtful preparation, you can avoid common mistakes and confidently tackle any project. Our guide provides you with straightforward tips to replace or add new hardware, making your home upgrade easier than you think.
Choosing the Right Tools and Materials
Choosing the right tools and materials is key to a successful hardware installation. Start by gathering essential tools. You’ll need a screwdriver set, a measuring tape, a level, a pencil, and a drill with various bits. Having these tools on hand ensures the process is smooth and avoids unnecessary trips to the store.
Next, focus on selecting materials that complement your home’s style and meet your needs. If your home features a classic design, choose traditional materials like brass or bronze for a cohesive look. For a modern touch, consider sleek finishes like chrome or stainless steel. Whatever your choice, ensure that the materials are durable and user-friendly.
Understanding measurements and compatibility is crucial. Measure existing fixtures to match sizes accurately, ensuring the new hardware fits perfectly without requiring additional alterations. Double-check compatibility with doors or drawers to avoid mismatches. Taking precise measurements prevents issues like drilling errors or ill-fitting hardware, which could spoil your project’s success. Thoughtful selection and preparation lay the foundation for a hassle-free installation, saving you time and ensuring professional results.
Preparing for Installation
Preparing for installation makes the entire process more efficient and less stressful. Start by removing old hardware safely and efficiently. Use a screwdriver to loosen and carefully take out screws. Keep old screws handy until the new hardware is ready to install if they are reusable.
Cleaning and prepping surfaces is the next important step. Wipe down the area to remove dust, grime, or old paint residues. A clean surface helps the new hardware to adhere better and function smoothly. Use a damp cloth or cleaning solution appropriate for the surface type to ensure thorough cleaning.
Organizing hardware components beforehand can save time and hassle. Lay out all tools and materials you’ll need, including screws, plates, and the hardware itself. Check the instruction manual if available. Organize screws and small components in bowls to avoid misplacing them. This organization allows you to concentrate on installation without interruptions. Properly preparing your space and maintaining order ensures a smooth installation process, setting you up for success.
Step-by-Step Installation Guide
Installing new hardware may seem daunting, but breaking it into simple steps makes it manageable. Start with cabinet handles and knobs. First, mark the spot where the hardware will be installed using a pencil. Use a ruler to ensure even spacing and alignment. Next, drill pilot holes where you marked. This prevents the wood from splitting and ensures the screws go in smoothly. Finally, fix your knobs or handles in place using a screwdriver to tighten the screws.
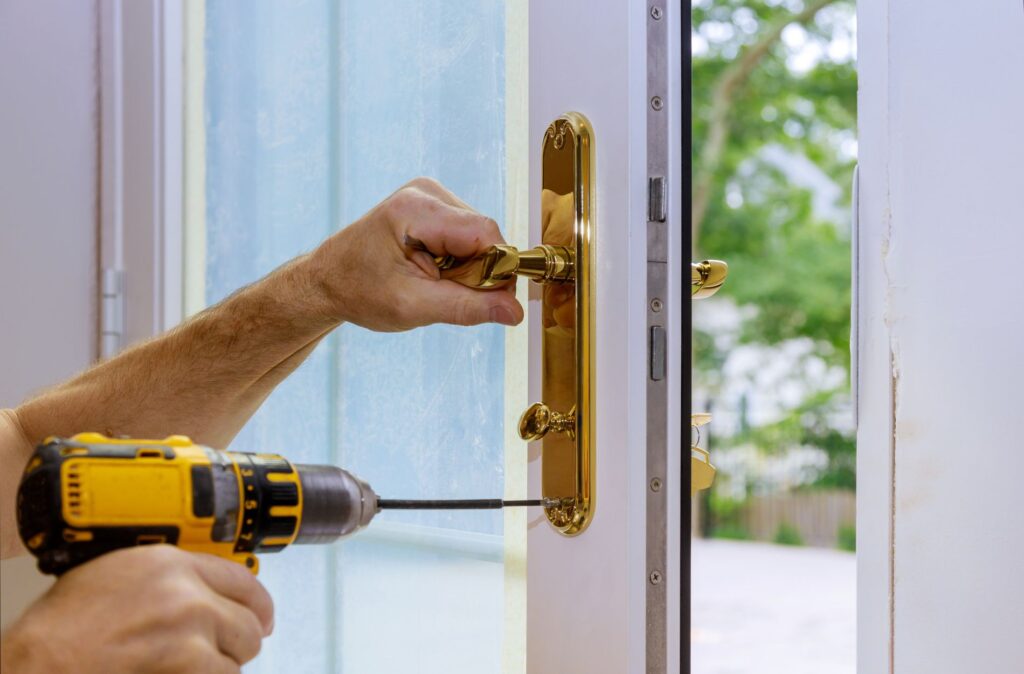
For hanging door hardware like handles and hinges, the process starts similarly. Begin by marking where the new hinges or handle will go. Use a drill to create necessary holes, ensuring they align properly with the hardware pieces. Attach the hinges first, securing them with screws. Then, check the door’s movement. Once hinges are set, install the handles, making sure they’re level. Screw tightly but with care to avoid over-tightening.
Ensuring alignment and securing each piece properly is essential. Constantly check that everything is lined up correctly before tightening screws all the way. This prevents future adjustments that could wear out both the hardware and the surfaces. Taking your time with each step guarantees your installation not only looks great but also lasts.
Troubleshooting Common Issues
Even with careful planning, you might face some issues during hardware installation. One common problem is misaligned installations. If a handle or hinge is off-center, unscrew it slightly to readjust. Use a level or ruler to ensure straight lines before tightening again.
Loose hardware can be annoying, but fixing it is usually simple. Tighten the screws with a screwdriver, ensuring they hold firmly. If the screws don’t grip well, check for stripped holes. If that’s the case, filling the holes with wood filler and re-drilling once dry can offer better grip.
Hardware that doesn’t fit properly can also occur. Double-check measurements to ensure compatibility. If a piece is slightly too big or small, adjustments might include choosing alternative hardware or slightly modifying the fitting areas.
Preventing damage during installation is vital. Avoid using excessive force, which can harm both the hardware and surfaces. When in doubt, refer to the installation instructions that come with your hardware. Ensuring you follow each step carefully reduces the chance of damaging materials or needing unwanted repairs.
Conclusion
Installing hardware yourself can transform any room and give you a sense of accomplishment. With the right tools, thoughtful preparation, and a clear plan, your installation can be both straightforward and rewarding. Remember, practice and patience make perfect.
Tackling a home improvement project builds confidence in your abilities. When you finish, enjoy the fresh, updated look of your improved space. It’s a small change that can make a big difference.
Ready to further enhance your home with more ambitious renovations? Reach out to Spire Construction & Remodeling to bring your vision to life. Our experts in Richardson, Texas, are here to assist with a wide range of remodeling projects, from kitchen updates to complete room transformations. Transform your space with our skilled team’s renovation services and enjoy your dream home today!